Open Graph images are meta tags that define the visual representation of a webpage when shared on social media platforms like Facebook, Twitter, LinkedIn, and others. These images serve as the preview thumbnails, giving users a glimpse of the content before they decide to click on the link
Structure
Adding Open graph image to any page is as simple as
adding the following lines inside <head>
of the page
<meta property="og:image" content="https://yourdomain.com/dynamic-image-endpoint">
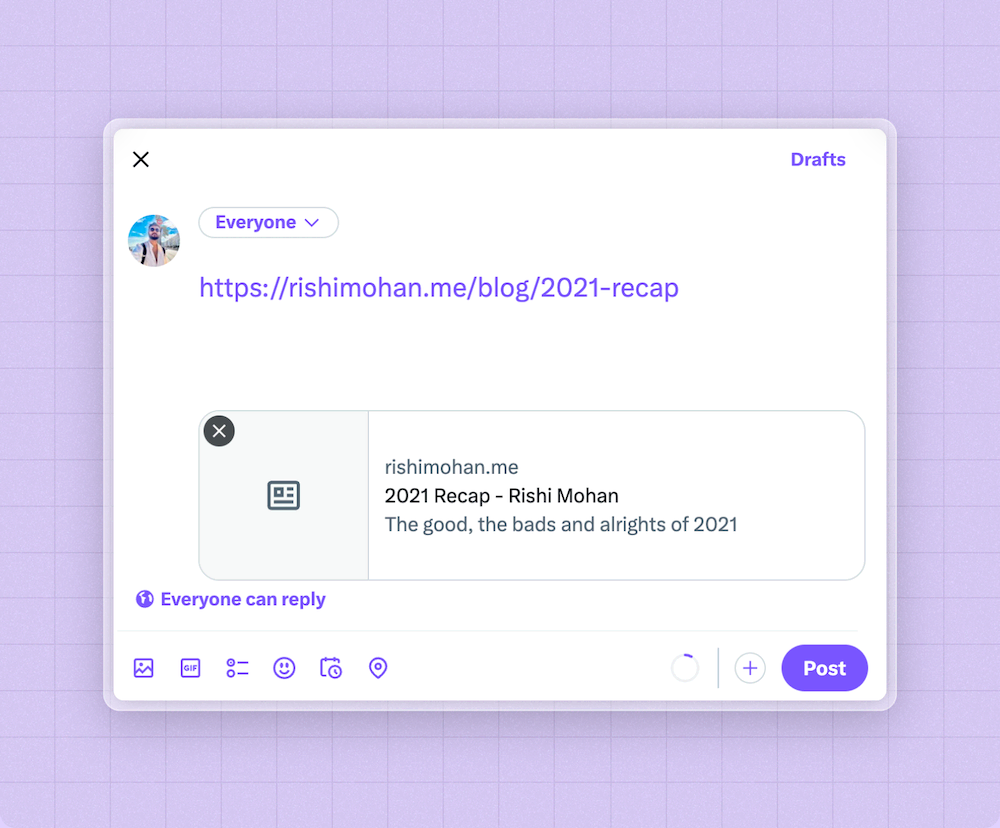
Link preview without Open graph image tag:
Link preview with Open graph image tag:
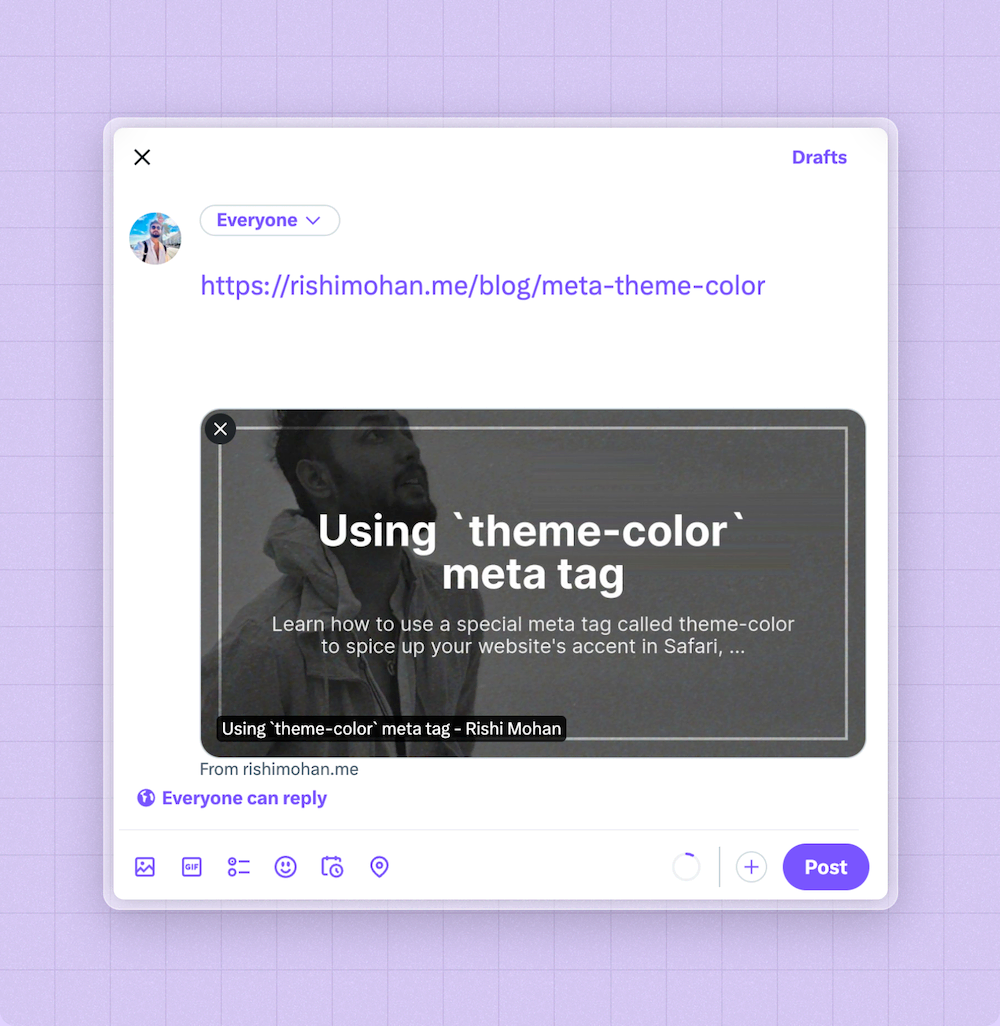
As you can see, with a proper Open Graph image, you can tell users more info about your page’s content and in a visually appealing way. This not only helps the user who sees your link know more about your page, but also helps decide how relevant and useful your page would be
Why go for dynamic OG Images
While static preview images work well of a static page, for example a landing page, it doesn’t nessacrily work well for blogs, newsletters, podcasts etc. Simply because blogs, newsletters, podcasts are dynamic pages and have different type of content on each page, one single static Open graph image doesn’t do justice to represent these pages in a nutshell
So instead of having a static OG image for these dynamic pages, you can dynamically generate a custom Open graph image for each of your blog posts, podcasts, newsletter issues etc.
Wouldn’t it be too much work to design a custom OG Image for each page? Yes, but you can also automate it. Let’s see how to do it
How to dynamically generate Open Graph images
We’ll use Pika to generate dynamic Open graph images. Pika is service for automating dynamic image generation through API
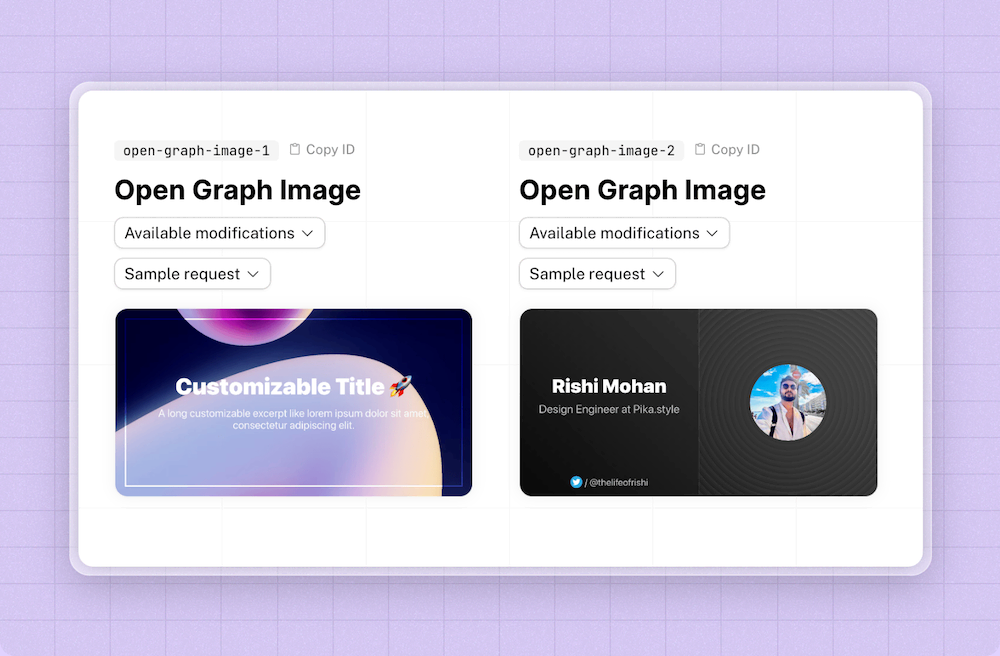
Pika has multiple Open Graph image templates to choose from. You get OG Image templates for blog posts, user profiles, newsletter issues etc. You can select and customize each of the API template for your use case
How it works:
- Signup for Pika and get your API key
- Select an Open Graph Image API template
- We’ll use this template to generate dynamic OG images using API routes
In Next.js with App directory
Start with creating a new route.js file at /src/app/api/og/route.js
export async function GET(req, res) {
  const { searchParams } = req.nextUrl;
  const title = searchParams.get("title");
  const description = searchParams.get("description");

  const response = await fetch(
    `https://api.pika.style/v1/templates/open-graph-image-1/images`,
    {
      method: "POST",
      headers: {
        "Content-Type": "application/json",
        Authorization: `Bearer YOUR_PIKA_API_KEY`,
      },
      body: JSON.stringify({
        response_format: "binary",
        modifications: {
          title,
          description,
          textColor: "#fff",
          backgroundColor: "#111",
        },
      }),
    }
  ).then((res) => res.blob());

  return new Response(response, {
    headers: { "content-type": "image/png" },
  });
}
We’ll use this API route to take info and pass that to Open Graph Image API in Pika, and Pika gives us the image as response, which we’ll use as our OG image
You can customize the output image by changing textColor, backgroundImageUrl
and other available modifications.
Also make sure to replace YOUR_PIKA_API_KEY with your Pika API key.
Here’s how to find your Pika API key
Now, all we need to do is use this API route on pages where we want to generate dynamic OG images
So, let’s say you have a blog at /src/app/blog/blog-post-1.
You can use the metadata object like below to dynamically
generate Open Graph image for that blog post
export const metadata = {
  title: "How to train your dragon",
  description:
    "Learn how to train your dragon in 3 simple steps",
  openGraph: {
    images: "https://YOUR_SITE_ADDRESS/api/og?title=How to train your dragon&description=Learn how to train your dragon in 3 simple steps",
  },
};
Now if you navigate to this blog post, you’ll see a meta OG tag like below
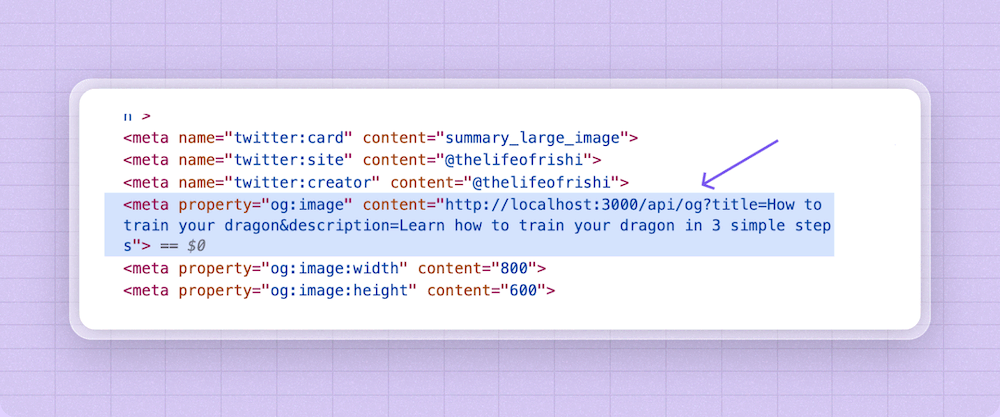
And the actual Open Graph image would look something like below. Note that I’ve customized my Open Graph with a custom background image :)

In Next.js with Pages directory
Setting up dynamic OG Images in Next.js with Pages directory is very similiar
Create a new API route at /pages/api/og.js with following content:
export default async function handler(req, res) {
  const { title, description } = req.query;

  const response = await fetch(
    `https://api.pika.style/v1/templates/open-graph-image-1/images`,
    {
      method: "POST",
      headers: {
        "Content-Type": "application/json",
        Authorization: `Bearer YOUR_PIKA_API_KEY`,
      },
      body: JSON.stringify({
        response_format: "binary",
        modifications: {
          title,
          description,
          textColor: "#fff",
          backgroundColor: "#111",
        },
      }),
    }
  ).then(async (res) => {
    const arrayBuffer = await res.arrayBuffer();
    return Buffer.from(arrayBuffer);
  });

  res.writeHead(200, {
    "Content-Type": "image/png",
  });
  res.end(response);
}
Again, make sure to customize the template
and use your API key in place of YOUR_PIKA_API_KEY
Now that we have the API route ready,
you can use it on blog post pages,
or dynamic [id], [slug] pages like so:
<Head>
  <meta property="og:image" content="https://YOUR_SITE_ADDRESS/api/og?title=How to train your dragon&description=Learn how to train your dragon in 3 simple steps">
</Head>
or something like if you have data coming from server side:
<Head>
  <meta property="og:image" content="https://YOUR_SITE_ADDRESS/api/og?title=${post.title}&description=${post.excerpt}`>
</Head>
If you’re having issues setting it up, feel free to DM me on Twitter. I would be happy to help you out
Testing
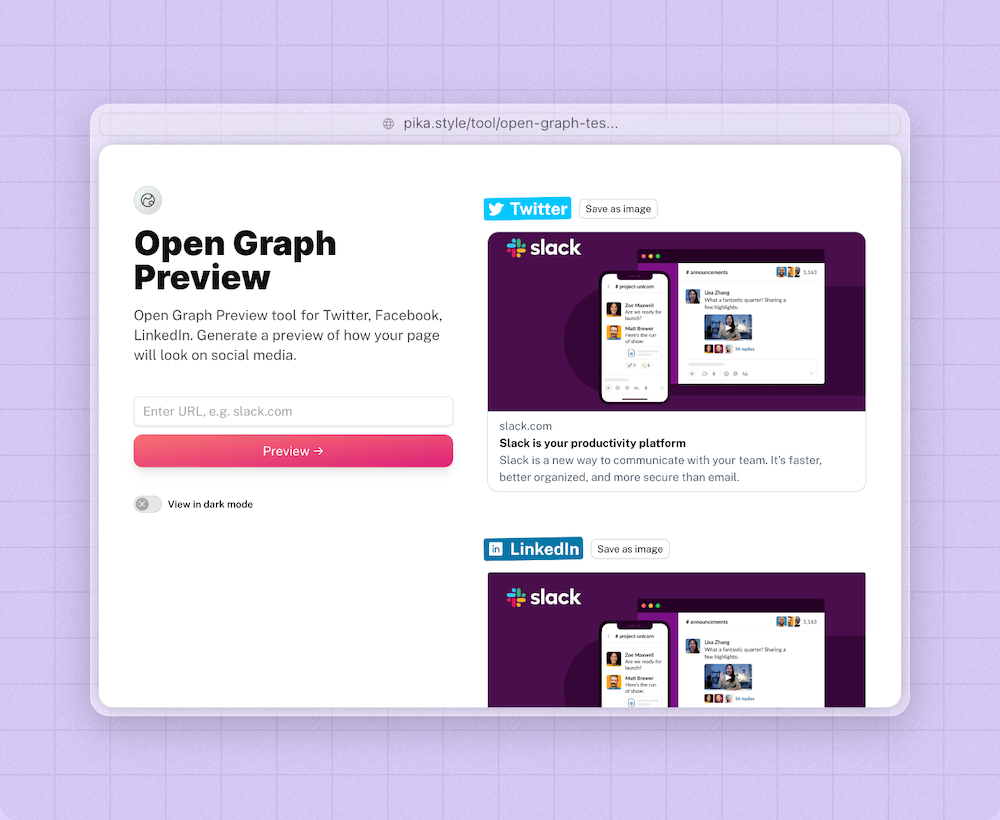
Testing Open graph image is easy. There are many tools that can help you see how your link would look on various social sites
- Open Graph Preview Tool (preview on all sites: Twitter, Facebook, LinkedIn, Pinterest and Google)
- Facebook Open Graph Debugger
- LinkedIn Post Inspector
Examples
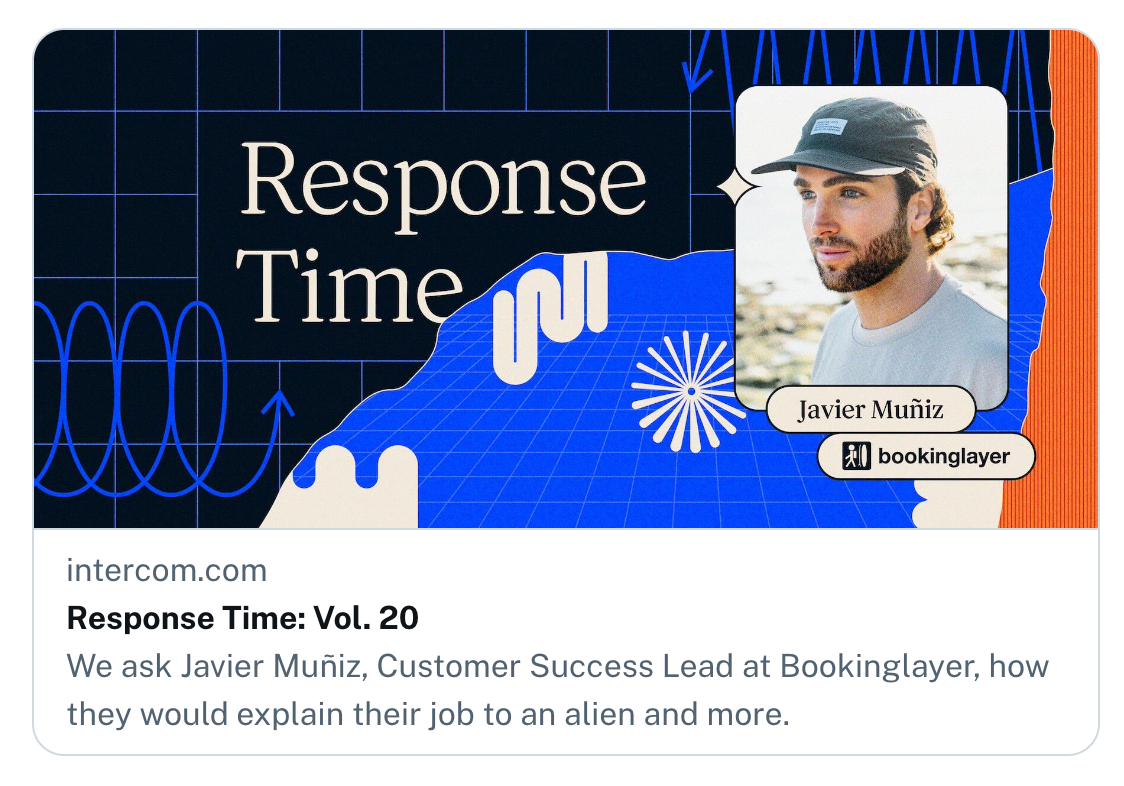
Here are some examples of sites that do great dynamic open graph image
Intercom Blog
Vercel Blog

Cal.com Profile Page

Peerlist Profile Page

Substack Post Page
